Image Processing
What it takes to produce the images you enjoy.
|
|
| Back to Main Astronomy Page Images Main Page Projects Page Producing astronomical images is an art as as much as a science, and it takes a lot of work. After reading this, you may have a greater appreciation for the time and effort invested by all the astronomers - amateur and professional alike - who produce and share their images with you. Most of the images published on this and other astronomy sites (including those made with the Hubble and other out-of-this-World telescopes) are "built up" from a number of individual images, each of them processed in a computer, layered on top of one another and pieced together to obtain the final image. Recent improvements in camera technology available to amateurs now allow the use of color cameras for one-shot color images. This eliminates the necessity of taking separate images with a black-and-white camera through color filters and then combining them, but the image quality of one-shot color hasn't (as yet) come up to the level of the filter-and-stack method, so here's how it's done the old-fashioned way: | |
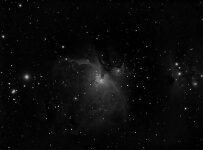
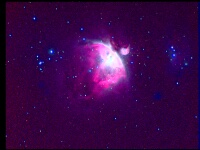
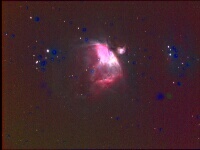
| For the image of M42 on this site, over 80 "raw" images like this one  |
were combined using a computer to produce this 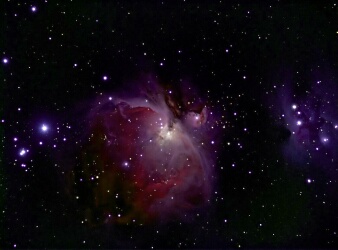 |
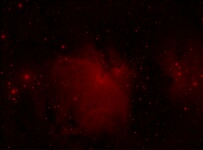
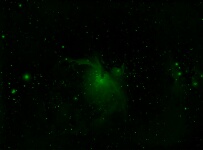
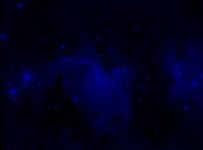
| We begin by taking a series of "raw" images with a black-and-white digital camera through colored filters. It's not unusual to spend several nights (perhaps over a period of weeks or even years) collecting a series all raw images that will be used to make up a single image. Usually, we take a series of images through four different filters - red, green, blue, and clear glass (or a narrowband filter instead of clear - more on that part later). We ended up with this: | |
20 images like this 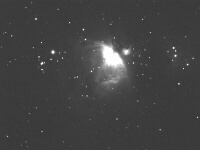
through a red filter |
20 images like this 
through a green filter |
20 images like this 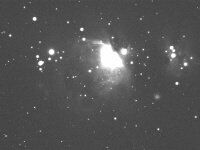
through a blue filter |
and 20 images like this 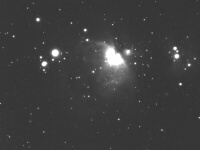
through a clear glass filter |
| The obvious thing about these images is that the background is a kind of muddy grey instead of black. This is because the imaging chips in all digital cameras have a certain amount of electronic "noise" in their output. The longer we expose the chip, the more noise we have to deal with. The images above were each about 2 minutes long. To get rid of this "noise" we take a picture of "nothing" by covering up the open end of the telescope and operating the camera as if we were taking a normal picture. This image of "nothing" is really an image of the noise produced by the camera. It's called a "Dark Frame", and it looked like this the night these images were taken. We also take two other kinds of noise-reduction images, called "Flat Frames" and "Bias Frames". Flat Frames help to eliminate the effects of dust particles and other imperfections that plague our optics, and Bias Frames help eliminate imperfections in the camera itself. In the computer, we subtract the Dark Frame, the Flat Frame, and Bias Frame from each of our regular images to come up with this: |
|||
20 images like this 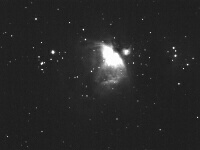
red |
20 images like this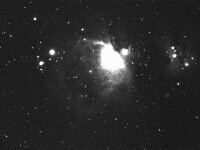
green |
20 images like this 
blue |
and 20 images like this 
clear (luminance) |
| We're getting better, but there's still quite a bit of noise in the images. This is because the computer subtracted out only the noise in each image that matched the noise in our Dark Frame, Flat Frame, and Bias Frame, and each image has a slightly different amount and pattern of noise. To minimize this, we "stack" our images in the computer. The software evaluates each pixel in several images, and keeps the pixels that have about the same value, while discarding (turning black) those pixels that have a much different value from image to image. In this way, more noise is removed, and we start to see a cleaner, sharper image. The difference can be dramatic, even by "stacking" just two images: |
|||
This image 
|
stacked with this image
|
looks like this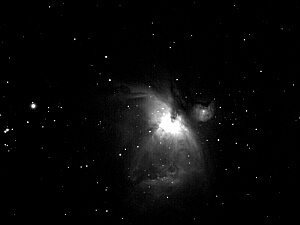
|
|
Each time we add another image to the stack, the information we want to see gets stronger, and the noise is further reduced. After 20 images have been stacked, this is the result: | 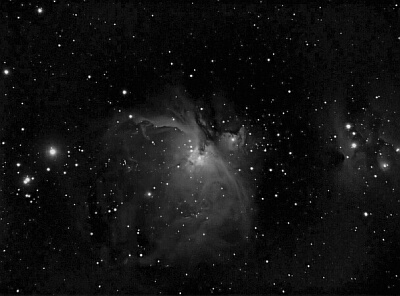 |
| Now we tell the computer to assign colors to our stacked groups of images, and put them all together: |
red |
green |
blue |
luminance |
| In simple terms, the red, green, and blue images are mixed together to determine what color each pixel should be, and the luminance frame determines how bright that pixel should be in the final image. A note about that luminance image: Earlier I mentioned that we sometimes use a narrow-band filter to make the luminance frame. This is the case with this image, where the luminance frame was imaged through a "Hydrogen-alpha" (Ha) bandpass filter. What this means is the light in the luminance frame was emitted by Hydrogen atoms that had been energized by radiation and were giving off a portion of that energy as a very specific color of light. This light is not white. It's a very deep red. Ha light usually makes good luminance frames for this kind of image because the camera does not "see" very much of the light pollution that may be present. It sees only the stars (which are rich in Ha light) and the hot gas in the nebula that's actually glowing in Ha. We get sharper, more detailed images than if we exposed our imager to the full width of the spectrum our camera can see. |
| Our first results probably aren't very good. We must "tweak" the four images in the computer, and try, try again... |
Tweak... |
Tweak... |
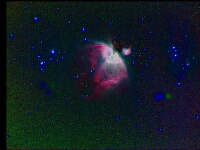
Tweak... |
Tweak... |
|
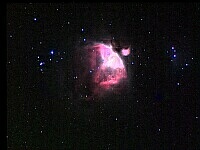
Until we arrive at an image we find difficult to improve. It may be far from perfect, but we've been tweaking for a very long time, and we decide that what we have is good enough: |
 |